
Hello there!
I recently managed to get myself a guitar I’ve been after for a very long time, a Line 6 Variax 600. I drove nearly a 500 mile round trip to pick it up a few weeks ago. Got it home and using the power brick and an amplifier it played great, however I wanted more! Queue a Line 6 POD XT Live bidding war on eBay!
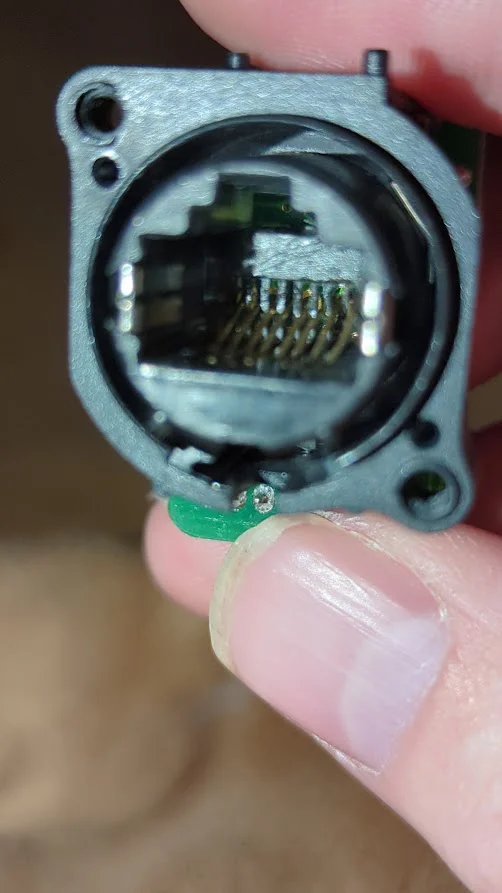
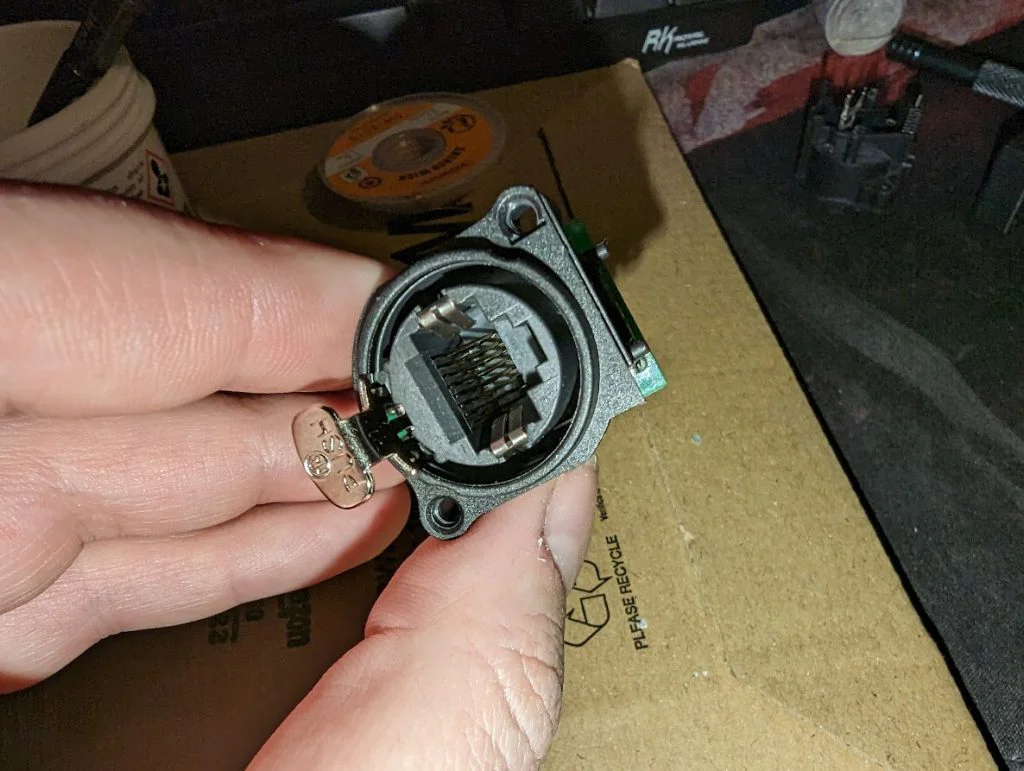
The POD landed on Monday, I quickly brought it home, fired up Variax Workbench and connected the guitar… Nothing… I wiggled the cable in the back of the guitar, connected, disconnected… Oh no! I look inside the port and it’s fairly obvious somebody has smashed a 1/4″ jack in there, bent some of the pins, deformed the plastic runners for the pins to slide up and down, it was a gone-er.
Frantically googling I discovered lots of parts that used to be available but nothing that has recently been in stock anywhere.
Went digging around the internet to learn more about this Ethercon / Neutrik interface / socket and managed to track down the NE8FAV which is the same socket used on the PCB of the Variax 600’s (I presume all Variax’s – at least the first generation – use the same port).
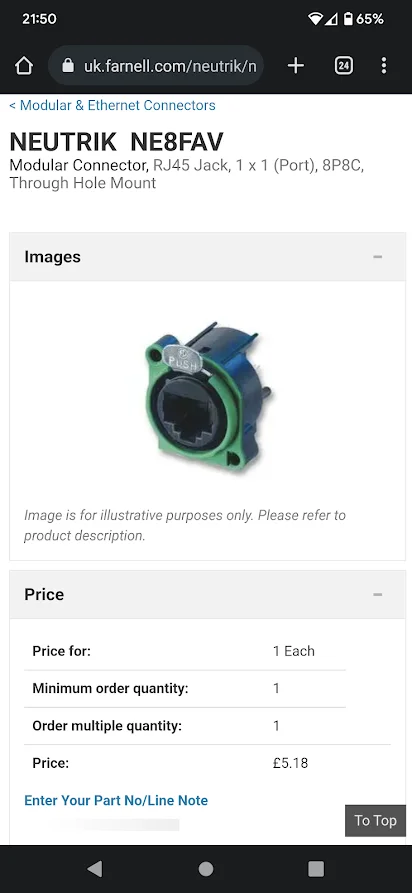
Ordered the NE8FAV for £5 (Plus shipping, plus handling worked out to £18 to get it to my door quick smart) and a little bit of soldering later and I’m back in action! So I thought best to get a post on here for anybody else who finds themselves in a similar position.
Disclaimer, if your device is in warranty and/or you’re not comfortable soldering, don’t attempt this repair. It’s fairly straight forward but neither myself or anybody else can be held responsible if you mess this up. – That aside, lets get this guitar fixed!
Remove the 4 screws holding the jack plate into the corner of the guitar, I personally put them down on my desk in a sequence that allows me to put the same screw back in the same hole, just good practice in my opinion.
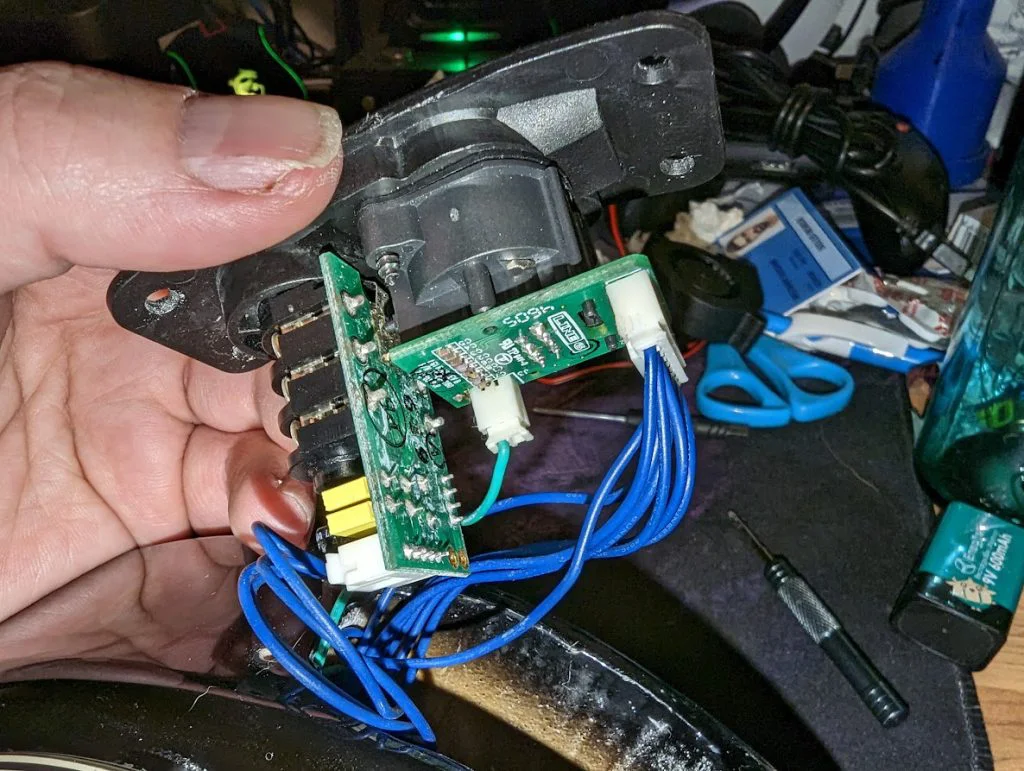
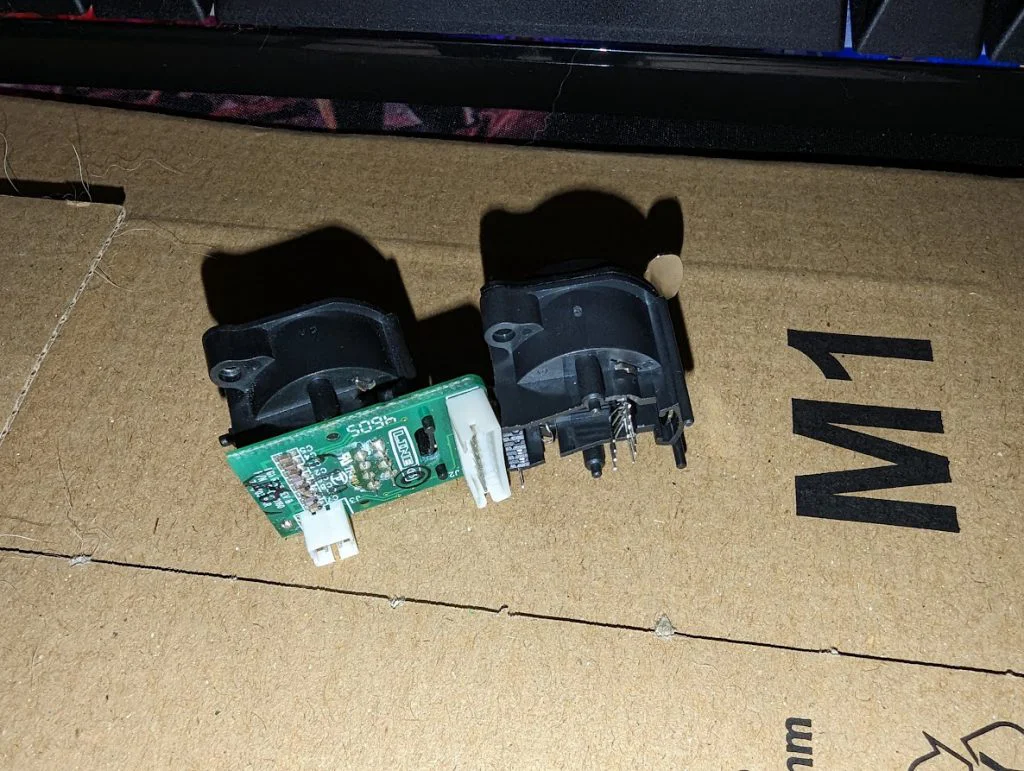
With the plate loose, gently lift the plate away from the guitar being careful not to pull on anything that doesn’t want to move, the wires and everything is packed in there quite tight so approach this with care and you’ll soon have it out enough to lift the plate away and remove the 2 pin connector and the 8 pin connector (Note that only one wire is connected to the 2 pin connector, don’t panic you didn’t pull anything off!)
With the plate still attached to the guitar, gently tilt the assembly towards you and remove the 2 screws holding the VDI port in place.
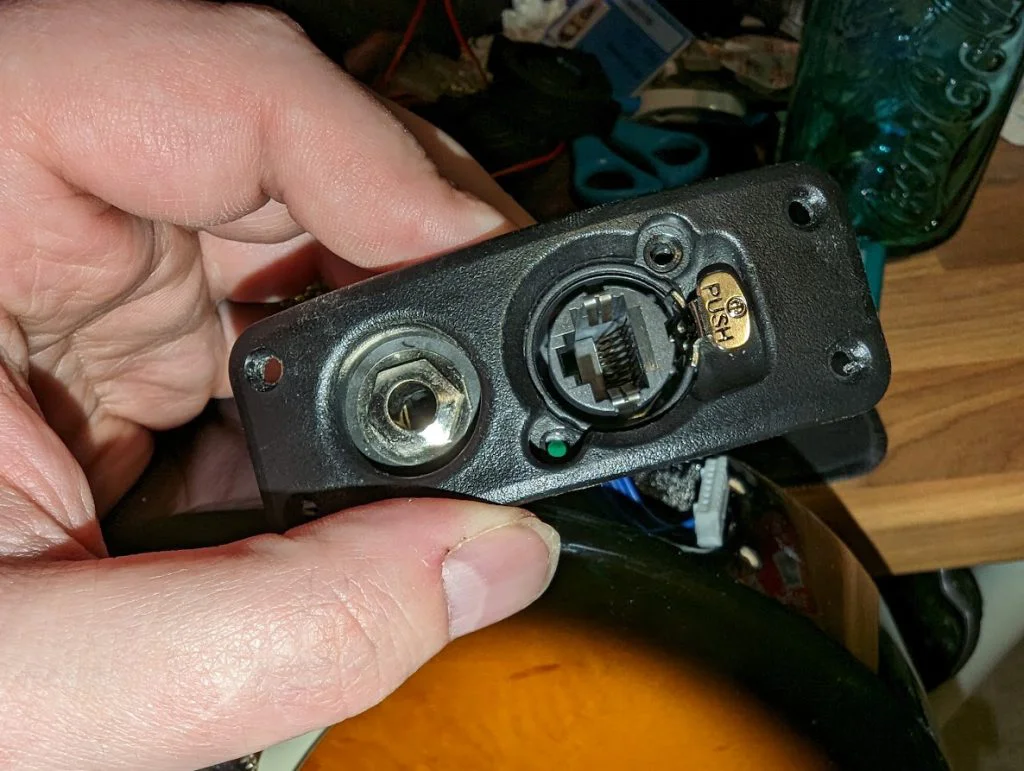
The PCB should wiggle out from the back of the plate, I angled the non-PUSH side down first and then slid that forward so I could un-hook the PUSH tab.
With the PCB out you’re rocking and rolling now!
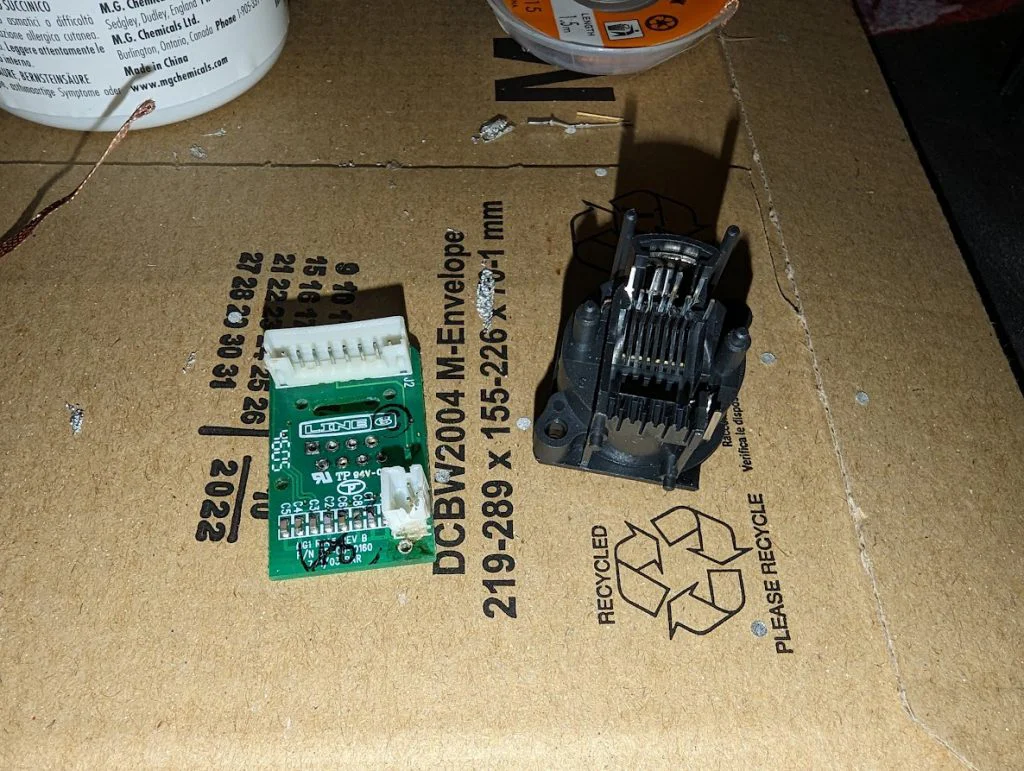
VDI PCB and new replacement socket side by side (excuse the dog hair stuck to the Amazon pouch, two big hairy dogs, that stuff gets everywhere!) as you can see the parts are identical.
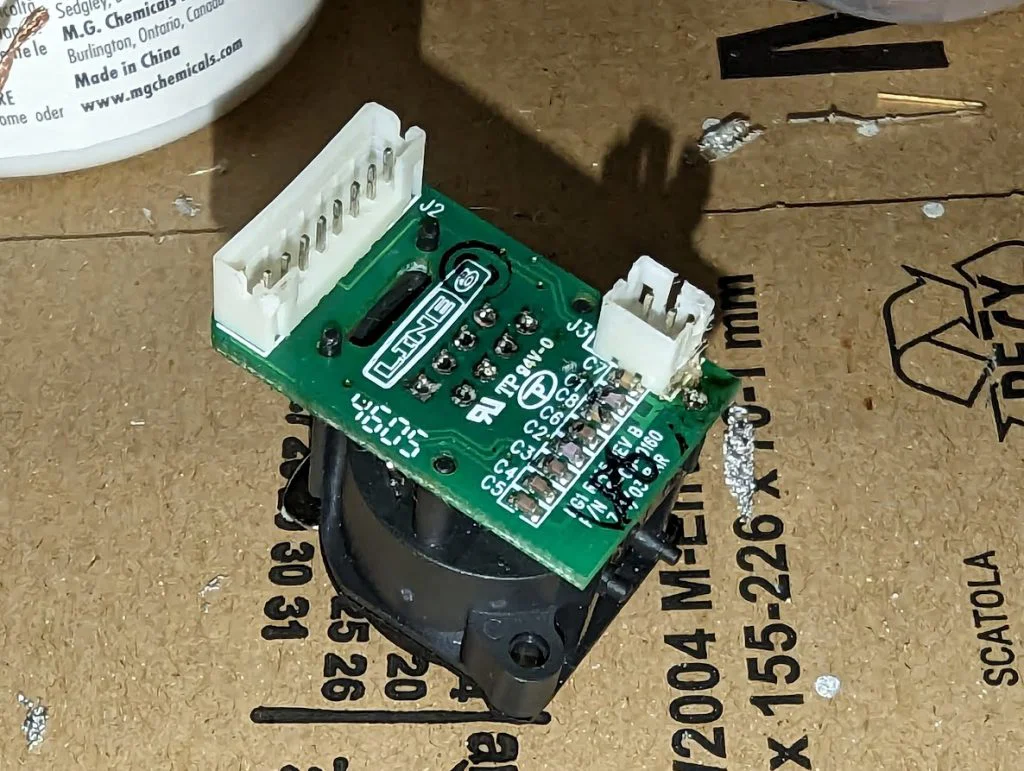
Now this is the tricky part, I added a little bit of low melt solder to the 9 solder joins, there’s 8 that you can see in the middle of the PCB and a lonely pin hiding just to the left of the 2 pin socket in the image above.
Once you’ve de soldered the socket, wipe down the PCB with a little Isopropyl and make sure that you’ve not melted the 2 pin JST connector like I did! Whoops!
Carefully fit your new socket ensuring everything lines up and all of the pins have come through the board ready for you to solder them in place.
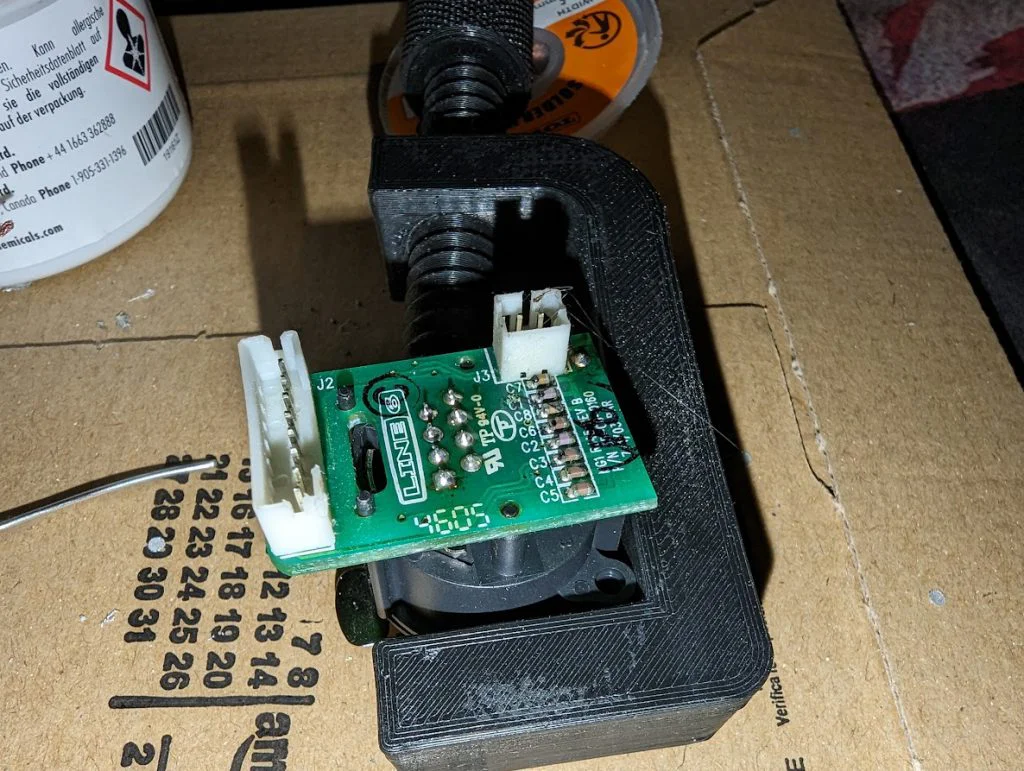
Time to add some flux and do some soldering, remember, heat the joint and apply the solder to the joint, don’t go feeding solder into the iron. So I like to heat the right hand side of a pin and then apply the solder form the left side. Also keep in mind that these pins go into a plastic housing, so watch how much heat you’re applying and take a short rest between pins.
I clamped mine down and whilst applying pressure to the board I did the single pin near the 2 pin JST socket first to lock that in place and the I slowly worked my way around the remaining 8 pins.
I then wiped everything down with Isopropyl again to remove any remaining flux and the job was done!
New pristine socket ready to go!
Re-fitment is reversal of removal (love saying that), be careful when screwing the socket back in, you’re cutting new threads in plastic so it will need a bit of force but you don’t want to go swinging off it. Also when screwing the jack plate back into the body don’t go cranking on those screws either or you’ll strip the wood and that’s a whole other guide! (thankfully one I haven’t had to write for myself yet!).
I hope this helps anybody who’s in the same position, I would wholeheartedly suggest you get this repair done by Line 6 if that’s an option!
I however wasn’t in a position to and it’s a 22 year old guitar, if it wasn’t a quick cheap fix I’d probably not have fixed it and sold the guitar on (like passing on a bad penny!).
Lots of love
Panic